Category Colors

About this plugin
type: WordPress Plugin
languages: PHP, HTML, CSS, MySQL and jQuery javascript, and Colorpicker library
version nr: 1.1
release date: 16/09/2013
This plugin is compatible with all newer versions of WordPress, tested up to WordPress version 3.6.1
Buy this plugin at CodeCanyon here: http://codecanyon.net/item/category-colors/5587892
For a FAQ check out: http://codecanyon.net/item/category-colors/5587892/support
Plugin documentation URL: http://www.atypisch.nl/plugins/category-colors/
How to install
Just copy this plugin (the entire ‘category-colors’ folder) into your WordPress plugins directory.
Then go to your plugin section in the WordPress CMS and click ‘Activate’.
How to change a Category Color
In your WordPress CMS, go to Posts -> Categories and click on a Category you have already created. You cannot choose a color directly when creating a category, because we want to keep creating categories sweet and simple 🙂
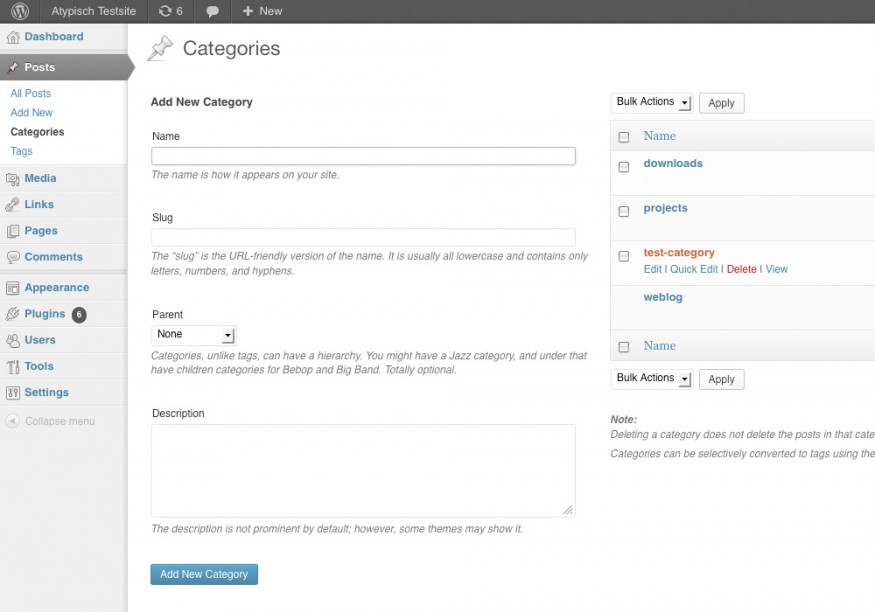
In your Edit Category section, in the bottom you will see a new option called ‘Choose your Category Color. Click on the textfield with the colorcode in it, then a jQuery colorpicker will appear.
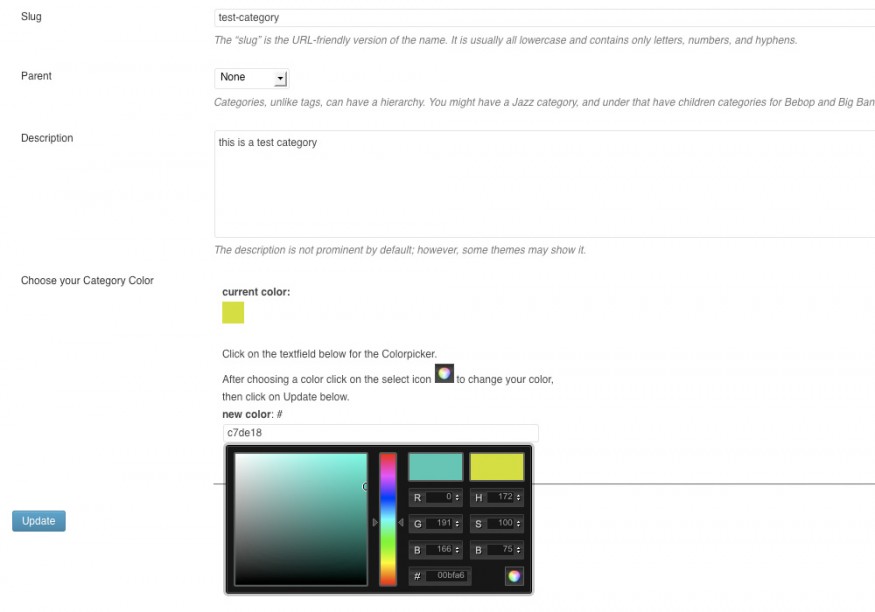
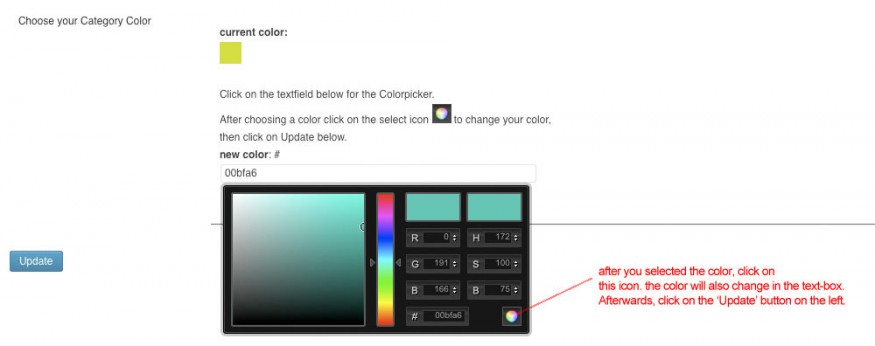
Move your mouse in the color-area or change the RGB values. To select a color, click on the ball-shaped colored icons in the lower right corner of the colorpicker. The value will then also change in the textfield.
After that, click on the blue ‘Update’ button on the left.
After you have clicked the Update button you will be send to the Category overview section. In the top of the page you will see the message ‘Item updated’.

How to change a Default Color
In your WordPress CMS, go Settings -> Category Colors. Note: you will have to be logged in as an Administrator to be able to view this page. Here you will see a brief overview of the plugin and Template usage. The default Category color will be used when a new category is created. Afterwards, you can change the color per Category ofcourse.
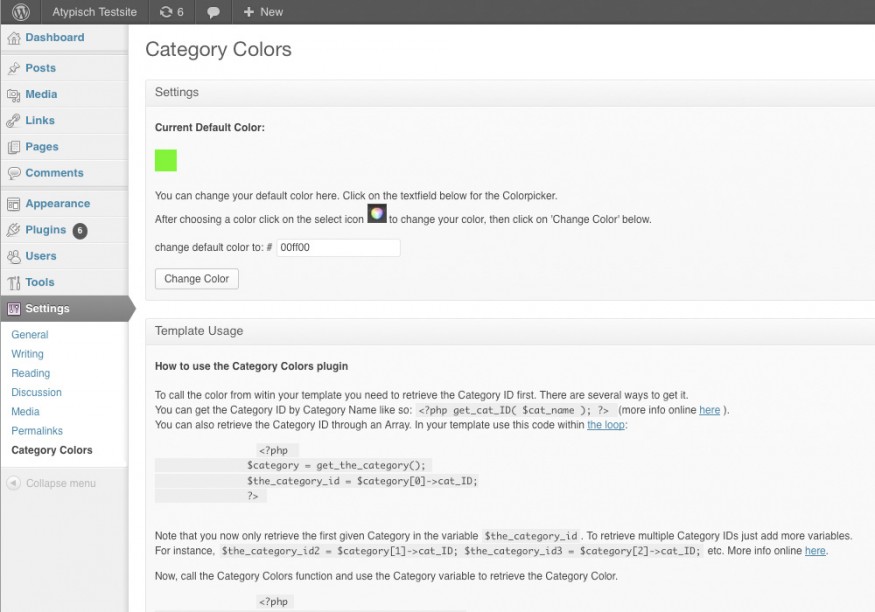
To change the default color, click on the textfield with the colorcode in it, then a jQuery colorpicker will appear.
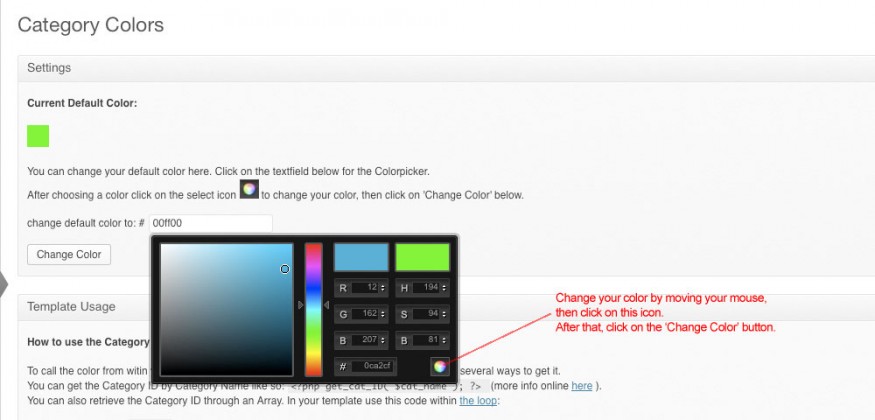
Move your mouse in the color-area or change the RGB values. To select a color, click on the ball-shaped colored icons in the lower right corner of the colorpicker. The value will then also change in the textfield.
After that, click on the blue ‘Change Color’ button on the left.

After the default color is updated, the new color will appear in the square below ‘Current Default Color’ and in the textfield.
Template Usage
To call the color from witin your template you need to retrieve the Category ID first. There are several ways to get it.
You can get the Category ID by Category Name like so: <?php get_cat_ID( $cat_name ); ?> (more info online here ).
You can also retrieve the Category ID through an Array. In your template use this code within the loop:
<?php
 $category = get_the_category();
 $the_category_id = $category[0]->cat_ID;
 ?>
Note that you now only retrieve the first given Category in the variable $the_category_id. To retrieve multiple Category IDs just add more variables. For instance, $the_category_id2 = $category[1]->cat_ID; $the_category_id3 = $category[2]->cat_ID; etc. More info online here.
Now, call the Category Colors function and use the Category variable to retrieve the Category Color.
<?php
 if(function_exists('cc_get_color')) {
 $category_color = cc_get_color($the_category_id);
 }
 ?>
You can use the variable <?php echo $category_color; ?> anywhere in your template file after the call. Now you can spice up your Posts and Categories with your own custom colors, have fun!
For more plugins or updates by Atypisch visited the Atypisch CodeCanyon account or the Atypisch website.